Windows Forms | VB.Net
VB.Net programmers have adeptly employed forms as a fundamental tool for constructing compelling user interfaces. Whenever you embark on the creation of a Windows application, the Visual Studio IDE seamlessly presents you with a default blank form, acting as a blank canvas upon which you can unleash your creativity.
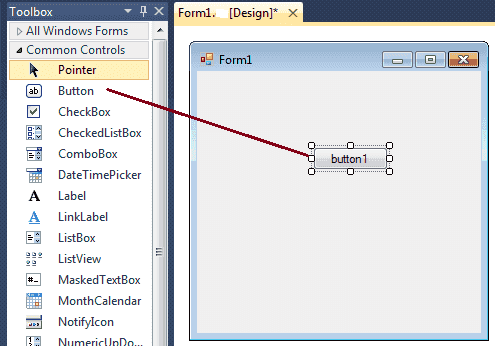
To expedite the development process, Visual Studio equips you with the convenience of effortlessly dragging and dropping controls from the expansive array available within the Visual Studio Toolbox window. This intuitive approach empowers you to seamlessly incorporate and arrange controls, facilitating the creation of visually appealing and interactive user interfaces.
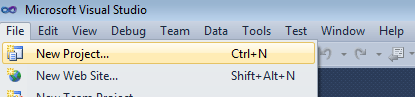
To commence the process, the initial step involves initiating a new project and constructing a form. Launch your Visual Studio IDE and navigate to the top menu. From there, select "File" and choose "New Project" from the drop-down menu. A dialog box labeled "New project" will appear, providing a range of options. Within this dialog box, opt for "Visual Basic" as the programming language. Next, locate and select "Windows Forms Application" to indicate your intention to build a Windows-based application.
To proceed, replace the default name "WindowsApplication1" displayed at the bottom of the dialog box with your desired project name. Once you have specified your project name, click the "OK" button to proceed. A visual representation illustrating the step-by-step process of creating a new form within Visual Studio is depicted below for your reference.
Select project type from New project dialog Box.

Upon adding a Windows Form to your project, a multitude of default properties are automatically assigned to the form. While these default values may be convenient in certain instances, it is important to recognize that they may not always align with your specific programming requirements. As a result, customization becomes necessary.
For visual reference, the following image presents an illustration of how the default appearance of a Form looks like within Visual Studio. This depiction serves as a starting point, allowing you to envision the initial structure and layout of the form as you embark on tailoring it to suit your desired user interface design and functionality.
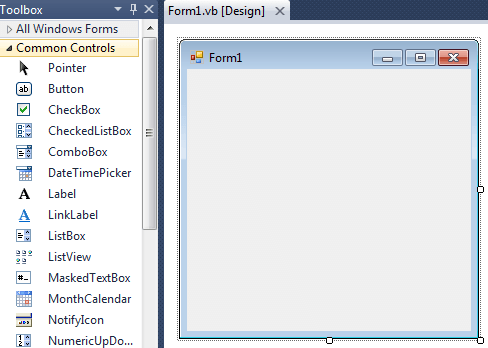
Located at the uppermost part of the form is the title bar, a crucial component that showcases the title of the form. By default, the title bar displays the name "Form1," serving as the initial identifier for the form. However, you have the flexibility to modify this name according to your preferences, thereby ensuring a more meaningful and personalized representation.
Additionally, the title bar encompasses the control box, an integral element housing essential buttons. These buttons provide key functionality, enabling users to minimize, maximize, and close the form. The minimize button reduces the form to the taskbar, the maximize button enlarges the form to occupy the entire screen, and the close button terminates the form and returns control to the operating system.
Together, the title bar and control box form an essential visual and functional component of the form, facilitating user interaction and navigation within the application.
If you want to set any properties of the Form, you can use Visual Studio Property window to change it.
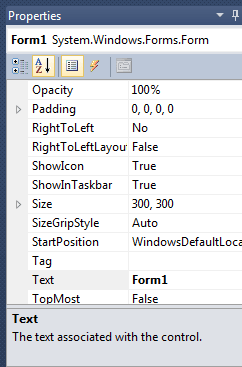
For example , to change the forms title from Form1 to MyForm, click on Form1 and move to the right side down Properties window, set Text property to MyForm. Then you can see the Title of the form is changed. Likewise you can set any properties of Form through Properties window.
You can also set the properties of the Form1 through coding. For coding, you should right-click the design surface or code window and then clicking View Code.
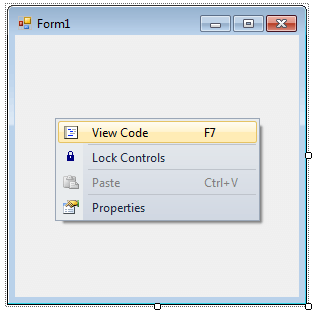
When you right click on Form then you will get code behind window, there you can write your code.
For example , if you want to change the back color of the form to Brown , you can code like this.
Likwise you can change other properties of Form1 through coding.
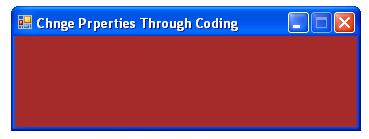
The following VB.Net source code shows how to change the Title, BackColor, Size, Location and MaximizeBox properties of Form1. Copy and paste the following VB.Net source code to source code editor of your Visual Studio.
Full Source VB.NETWhen you execute (press F5 key) the program the form is look like the following image.
The Windows based programs you create using Visual Basic .NET run in the context of a form. When you close the form, the application also ends.
Benefits of Using Windows Forms in VB.NET
- Rapid Prototyping: Visually design your UI early in the development process, enabling quick feedback and iteration.
- Rich Set of Controls: Extensive library of pre-built controls for common UI elements (buttons, text boxes, list views, menus, etc.), reducing development time.
- Event-Driven Programming Model: Respond to user interactions and other events, making your application dynamic and responsive.
- Integration with .NET Framework: Leverage the vast .NET class library for various tasks like data access, networking, file I/O, and more.
- Wide Deployment: Windows Forms applications can run on any Windows machine without requiring additional installations.
VB.NET Form Properties
VB.NET Form Methods
VB.NET Form Events
Conclusion
Windows Forms in VB.NET provides a robust framework for creating graphical user interfaces (GUIs) in desktop applications. Leveraging a drag-and-drop design approach and a rich set of controls, developers can quickly build interactive and visually appealing applications, enhancing user experience and productivity. Additionally, seamless integration with the .NET ecosystem and comprehensive event-driven programming capabilities empower developers to create dynamic and responsive desktop applications with ease.
- VB.Net ComboBox Control
- VB.Net ListBox Control
- VB.Net Checked ListBox Control
- VB.Net RadioButton Control
- VB.Net CheckBox Control
- VB.Net PictureBox Control
- VB.Net ProgressBar Control
- VB.Net ScrollBars Control
- VB.Net DateTimePicker Control
- VB.Net Treeview Control
- VB.Net ListView Control
- VB.Net Menu Control
- VB.Net MDI Form
- VB.Net Color Dialog Box
- VB.Net Font Dialog Box
- VB.Net OpenFile Dialog Box
- VB.Net Print Dialog Box
- KeyPress event in VB.NET
- How to create Dynamic Controls in VB.NET ?
- How do i keep a form on top of others
- Timer Control - VB.Net